Monday, August 31, 2009

Cheddar Frittata and Julia Child


I never knew who Julia Child was until the movie Julie & Julia came out. When I saw the movie, I was completely charmed. Julia Child was an amazing woman and an inspiration. Although cooking was considered an art mostly dominated by men in France, she graduated as a chef from the Le Cordon Bleu and immersed herself in French cuisine. She showed American women that cooking could be a fulfillment and not an obligation. In some ways she was also a feminist and she didn’t even know it. It was uncommon for women in the 1940’s to find love later in life, but Julie fell in love and married in her thirties. After reading her book, “My life in France”, I felt very inspired by Julia’s love for the French. It was as though French food awoke a great passion inside her and some where along the line she had found herself in France.

I really enjoyed “My life in France” and anyone that is a foodie would very much enjoy it. I feel that in at my young age, I have not had that passion awake in me yet. But when I think about Julie Child and her story, I hope and look forward to finding my passion very soon. Bon Apetit!


Cheddar Frittata

1/2 pound potatoes, cut into 1/2-inch pieces
1 tablespoon olive oil
coarse salt and ground pepper
8 large eggs
1/2 cup milk
1/4 teaspoon hot-pepper sauce
1 tablespoon Dijon mustard
1 cup shredded cheddar cheese
1 package frozen chopped broccli, thawed and patted dry

1. Preheat oven to 400 degrees F.In a 9-inch deep-dish pie plate, toss potatoes with oil, salt and pepper. Roast in oven for 10 minutes. Toss again and roast for another 10 minutes. Set aside and let cool.

2. In a medium bowl, whish eggs, milk, mustard, hot sauce, salt and pepper to taste. Mix in cheddar and broccli.

3. Pour egg mixture over roasted potatoes and distribute evenly. Bake for 45 to 50 minutes.

Source: Adapted from Everyday Food.

Saturday, August 29, 2009

A Manifesto and Pineapple Sorbet

I think I am becoming a serious food snob because the thought of eating food out of a box makes me cringe. Every time I taste food, I always wonder if it is made from scratch. And if it is not, I start thinking about the preservatives.


I am convinced that it is the preservatives in food that is so fattening, not the food itself. The more I think about preservatives, the more I distrust the common brands you see at the super market. Large food companies save so much money by adding preservatives to their food products so that they will stay on grocery shelves longer. It is the hydrogenated oils that start accumulating around our waist. And it is those preservatives that compromise the quality of the taste (Yeah, I’m talking about high fructose corn syrup!), but nobody can tell the difference because we as a consumer have become so accustomed to the taste.


Today I ate store bought ice cream and I could tell that the taste wasn’t as rich as it should be...and I kept wondering why it was so yellow. Mine never came out looking that yellow when I made it at home. I kept thinking to myself “I hope it wasn't made out of margarine”. Silly isn't it? Ice Cream doesn't even have margarine. But the color reminded me of it. Bleech!


Its funny because these strange thoughts never crossed my mind before. But it all started when I began to cook from scratch. I am beginning to notice that the more I cook from scratch, the more I can note a difference in the quality of the food and taste. Every time I discover a recipe for something that I can make from home such as my own butter, ricotta cheese, vinaigrette, bread, extracts, ice cream… or all-purpose solution, laundry and dish washing detergent… or dog food… the more I realize that you can make ANYTHING at home. So why as a society have we become so dependent on brand name products?? I think we have allowed ourselves to become so incredibly lazy. We say we buy these things because it is a trade off and we are purchasing the convenience of not having to make our own homemade food or products. But as a result, we have sacrificed our health. And the more we become loyal and dependent on brands, the more we get fatter and sicker.


That is not what I want for my family. I want to be able to control the ingredients that go into our bodies to ensure to the best of my ability that they are wholesome and healthy. From here on out, I vow that I will do my best to make my own food and house hold cleaners. I know this will not always be possible, but I will try and I will share each experience on this blog for anyone else out there interested in doing the same.

On that note, here is a great recipe for Pineapple sorbet. It was quite delicious and each spoonful was a burst of juicy pineapple flavor. The texture was not smooth, but more of a cold fine powder. This was definitely a refreshing treat to enjoy in the heat!

Pineapple Sorbet

1/2 pineapple peeled and cut in chunks
8-10 tablespoons sugar
1/2 cup water

1. Puree pineapple chunks in a blender. Add sugar and water until smooth. Freeze in ice cream maker according to manufacturer's instructions.

Source: Annie's Eats.

Sunday, August 23, 2009

Mexican Style Strata

Breakfast is one of my favorite meals of the day. It is important as it helps get your metabolism started early in the day and restores glucose levels. But the thing I enjoy the most about breakfast is that it is so good and easy to make.

A co-worker of mine gave me a loaf of Italian bread and I immediately knew I wanted to make strata with it. Strata basically consist of bread, cheese, and egg custard. You can also add other ingredients like bacon, ham, turkey and/or vegetables. But the real beauty of the strata is that it requires day old bread. This can include French bread, English Muffins, Sourdough bread or any kind of bread you may have. Once I discovered how to make strata, I stopped throwing out stale dry bread and instead salvage it for a good breakfast (or even dinner as it can be very hardy).


A strata is best when made the night before. It needs to be refrigerated overnight so that it can allow the bread to soak up the egg-milk mixture, which will result in a fluffy bread pudding consistency. It also needs day old or dry bread, which can easily be done by placing the bread slices in the oven on a baking sheet and toasting in a 200 degree F oven for 15 minutes. It is also best to use whole milk or half-and-half for a richer strata.


Mexican Style Strata

10 slices sourdough French bread, cut in large cubes (I used Italian bread as shown in picture)
3 cups Monterrey Jack cheese (Or use any cheese. I used mozzarella in picture)
2 cups cubed cooked chicken breast (optional)
2 cups medium salsa
1 cup sliced green onions
1 can (15 ounces) black beans, drained and rinsed
4 large eggs
2 1/4 cups whole milk
1 can (4 ounces) diced green chiles, drained (optional)
1/2 teaspoon salt
Freshly ground pepper
Guacamole and sour cream for topping (optional)

1. In a lightly sprayed or oil a 9-by-13 inch baking dish or casserole dish, arrange the bread. It is ok if the bread overlaps. Sprinkle a generous layer of cheese, chicken (optional), salsa, green onions, and beans.

2. In a medium bowl, whisk eggs with milk, chiles (optional), salt, and pepper to taste. Egg-milk mixture evenly on top of bread. Cover and refreigerate overnight.

3. Remove strata from fridge and set aside for 10 minutes or until room temperature. Preheat oven to 375 degrees F. Bake for 50 to 55 minutes uncovered. Let cool for 10 minutes and serve with guacamole and sour cream.

Source: The Big Book of Breakfast: Serious Comfort Food for Any Time of the Day

Wednesday, August 19, 2009

Cookies and Cream Ice Cream

This ice cream was so great! At first I wasn't sure if it was going to come through since I was short a few ingredients (as usual)--I only had 2 egg yolks on hand instead of the six that the recipe called for and the mixture just was not thickening. Also, I may have over cooked the custard, but it stll tasted delicious in the end! Just as good as the store bought quality ice cream. The only flaw was that the texture was crumbly instead of creamy, but that may have been because I added too many oreos. But nobody seemed to mind that. The more oreos the merrier!


Cookies And Cream Ice Cream

1 cup whole milk
2 cups heavy whipping cream
2 egg yolks (should be 6 egg yolks)
1/2 cup sugar
1 tablespoon vanilla extract
1 tablespoon chocolate extract
15 Oreos chopped and crumbled

1. In a medium bowl, whisk together eggs and sugar until smooth. Set aside. In a saucepan over medium heat, combine milk and cream until warm and bubbles form around the edges. Remove saucepan from heat and slowly pour milk mixture in to the bowl of eggs while whisking.

2. Pour combined mixture back into saucepan over medium heat. Stir in vanilla extract. Whisk until mixture begins to thicken, about 8-10 minutes. Remove from heat and cover. Chill in refrigerator for 2 hours.

3. Remove mixture from refrigerator and add chopped oreos. Pour into an ice cream maker and churn/freeze acording to manufacturer's instructions.

Source: Adapted from Annie's Eat's, orginally from Pennis on a Platter.

Saturday, August 15, 2009

Watermelon Limeade

From the Salpicon recipe I last made, I still had a big watermelon left over to use. There are so many beautiful tasty things you can create with a watermelon, but for this post, I decided to go with a watermelon limeade recipe that I found on Martha Stewart's website. Oh Martha, you have so many fabulous recipes to choose from!

But I have to admit, at first, I was a little nervous as to how it was going to taste. But it was quite refreshing and satisfying. I will definitely be making this again. I am sorry I ever doubted you Martha!

Obviously from the picture, I still have a hunk of watermelon still left over. Maybe I will just have to make watermelon pops with it...


Watermelon Limeade

6 cups chopped seedless watermelon
1/2 cup freshly squeezed lime and lemon juice
2 to 4 tablespoons sugar
Ice cubes for serving (optional)

1. Puree watermelon in a blender with lime/lemon juice. Mix sugar until well combined. Transfer to a pitcher and serve.

Source: Martha Stewart.

Wednesday, August 12, 2009

Enrichment Night: A Class on Wheat Bread


I am probably not the most qualified person to talk about food, since for many years I did not enjoy it. But I just wanted to share a quick note about myself regarding my journey as a foodie. When I was growing up, I was a very picky eater. My parents always openly shared stories of what a nightmare I was as a child during meal times. In high school, I think my friends secretly felt the same way.


But as I got older, I began to notice the power of food. Food would often bring my friends and me together during lunch dates. Food also brought my family and me together during the holidays. And most importantly, food would always bring my family (myself included), to my mother’s house. My mother always makes food in great abundance because she never knows who is going to stop by hungry. Food was always bringing me closer to the people I cared most about.


And as I fell in love when I was in college, my fondness for food became even stronger. When I was dating Matthew (now my husband), I began to understand food as a love language. Since I was very happy during our courtship, food became a positive association. I found myself looking forward to meal times. When invited to eat dinner at his parents’ house, there was so much love and happiness in their home that I think it made the food taste that much better.


Now that I am married and starting my own family, I am beginning to fully appreciate the power that food has in bringing people closer together and the comfort that it provides to many. And it is this realization that has fueled my love for recipe hunting and cooking. Nothing seems better than sharing a meal with the people you love.


But enough about me, let’s talk bread. For enrichment night at our ward, we had a bread making class and the President of Relief Society, Heather Lusvardi, did a wonderful presentation at her home. With her permission, I was able to take pictures of her making the bread step by step, from grinding the wheat to flour all the way to baking the bread. She has also allowed me to post her recipe, which is really fantastic because it skips the step where you have to let the bread rise. So instead of spending 3 hours making bread, Heather’s recipe only takes 1.5 hours to make.

The class was very informative and educational. I learned that after grinding the wheat grains into flour, it loses its nutrients with every passing day. So after you bake the bread, its nutritional value is strongest within the first of couple days. It is for this reason that bread that is bought at the store is not as nutritious as homemade bread because it sits in the shelves for long periods of time (it also contains preservatives to elongate its shelf life). You can also up the nutritious potency of your home made bread by adding beans to the grinder for more protein (a great way to use your food storage beans) or just adding 7 grains to the dough. For the bread that was made in the picture, Sister Lusvardi added Millet to the dough for that pleasant crunch. Another interesting concept I learned was that if you buy your yeast in bulk from Costco or Sam’s Club, you can store it in the freezer and it will keep indefinitely. This is a great food storage tip.

As you can see in the first couple of pictures, Sister Lusvardi has some really fun gadgets that she uses to make the bread (wheat grinder and bosch mixer). I have put those two items on my Christmas list. Hopefully as soon as Santa brings them to me, I will start making my own home made bread.

Thanks for sharing your recipe Sister Lusvardi!


Wheat Bread Using Red Wheat

Mix together:
3 cups whole wheat flour (made from griding Red wheat)
1 1/2 tablespoons instant yeast

Add:
3 cups warm water (115 degrees. Any higher and yeast will die)
1/4 cup olive oil
1/3 cup honey (use same measuring cup used for oil)
4 tablespoons powdered buttermilk or 1/4 cup powdered milk
Mix well and let sit for 15 minutes

Add:
1/4 cup wheat gluten
3/4 tablespoon salt
3 1/2 cups whole wheat flour

Mix well, knead for 10 minutes. The dough should pull away from the sides of bowl and be slightly sticky. Form 2 loaves and slap down against clean countertop to remove any air bubbles. Pinch sides of dough and put each loaf in a pan. Place into preheated oven at 250 degrees F for 20 minutes or until double in size. Turn heat to 350 degrees F and cook for another 20-22 minutes. Once done, remove from oven and mist top of each loaf with water or butter for a soft crust.

Source: Heather Lusvardi

Sunday, August 9, 2009

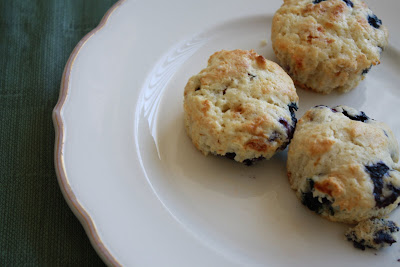
Blueberry Coffe Cake Muffins


I didn’t get very much sleep Friday night. I could hear my dog Muppet’s collar jingling all night long as he scratched himself desperately. It was like he had an itch that was driving him crazy. On Saturday morning, Muppet woke up with a bald spot around his eye. It was pink and raw. He had been scratching at it incessantly as well as his ears. I thought for sure he must have an ear infection, so I made an appointment with the vet. As I prepared breakfast, I decided I wanted to make blueberry muffins before I took Muppet to the vet. I had 7 pints of blueberries in the fridge that I had bought for .99 cents each using the price match deal.


As I opened each pint, I kept thinking of all the recipes I could make with the remaining blueberries after I baked muffins. I thought of blueberry pops, blueberry tarts, blueberry pies, blueberry sorbet, and blueberry jam…so many choices… I loved blueberries. They are so delicious and full of those healthy antioxidants. While I rinsed each pint, I caught the faint aroma of the fresh berry.


After rinsing most of the berries with a paper towel, I somehow managed to lose a few. Muppet is always looking to see what will fall and he immediately saw the couple of berries I lost. I didn’t think much of it since berries are not harmful to dogs. He sensed this and happily helped himself to the fallen berries. Muppet isn’t terribly picky—-he is an opportunistic eater.


So I prepared the muffin batter and put in the fridge. I left in a rush and took Muppet to the vet. Although I knew he didn't have a bad odor coming from his ear or any gooey stuff, I figured the ear infection would be the only plausible explanation for the scratching. But as it turns out, he was fine. He just had really bad allergies, explained the vet. So she prescribed some pills/ointment, sent me back home, and I went about the rest of my day.


Later that night, hubby came home from work and found the blueberry muffins. He enjoyed them very much and after a full stomach, he sat on the couch to watch TV. He strectched his arm under the pillow of the couch and upon doing so felt an odd sticky wetness. When he sat up to look at it, his gaze turned to the mashed up goo of blueberries that were plastered on the armrest. Guess I should have paid more attention to where Muppet went to eat the blueberries (wha wha wha!).


Blueberry Coffee Cake Muffins

12 tablespoons (1 1/2 sticks) unsalted butter, room temperature
1 1/2 cups sugar
3 large eggs
1 1/2 teaspoons pure vanilla extract
1 cup sour cream
1/4 cup milk
2 1/2 cup all-purpose flour
2 teaspoons baking powder
1/2 teaspoon baking soda
1/2 teaspoon kosher salt
1 pint (11 ounces) fresh blueberries

1. Preheat oven to 350 degrees. In a medium size bowl, sift flour baking powder, baking soda, and salt. Set aside.

2. In a mixer, cream the butter and sugar until fluffy. Gradually add the eggs one at a time, vanilla, sour cream and milk.

3. On low speed, slowly add the flour mixture to the batter and beat until just mixed. Fold in berries and mix.

4. Place 16 paper liners in muffin pans (my pan only held 12). Scoop batter into muffin pans using 1/4 cup. Bake for 25 to 30 minutes.

Source: The Barefoot Contessa Cookbook

Friday, August 7, 2009

Choconut Crazy Pecan Ice Cream

The last time I went to get ice cream at Ben & Jerry’s, I tried to order my favorite flavor, Coconut Almond Fudge Chip, only to find out to my horror that they had discontinued it. To my knowledge, that flavor didn’t exist anywhere else. Where on earth was going to get my fix?! I couldn’t believe it. I would never ever taste my favorite dessert ever again…until today. I give you, Choconut Crazy Pecan Ice Cream!


I was extremely pleased at how this ice cream turned out. Even my husband loved it…and I don’t think he even knew he would soon become a fan of coconut ice cream. So because of how spectacular it turned out, I thought it would be worthy of submitting this entry to the Got Milk? blog event held by Linda of Make Life Sweeter!. This blogging event was held to commemorate World Breast Feeding Week. Today is the last day as the event was being held from August 1-7, 2009. Although I have no children and I have never nursed, when I read the press release for this event, I felt touched by this movement and I somehow wanted to be part of this campaign. I can recall my mother telling me proudly that she had breast fed both my sister and that she knows breastfeeding was one of the reasons we turned out so healthy. I cannot imagine that nourishment being taken away from babies around the world, especially during emergencies due to lack of support. Nursing mothers need to be able to have priority access to food and water.

I hope to someday be able to nurse my own children for the six months that they need it. I am aware that it can be difficult, but I also know that there are many benefits that come out of breastfeeding. Linda does a great job of outlining the benefits of breastfeeding in this post.

Choconut Crazy Pecan Ice Cream

2 cups milk
2 cups heavy cream
2 cups coconut milk
1 cup coconut flakes, toasted
8 eggs yolks
1 teaspoon Pure Chocolate Extract 8 oz.
1 cup pecans
1/4 cup condensed milk
1 cup chopped bittersweet chocolate
1 1/2 cups sugar
Pink of salt

1. Turn oven to 300 degrees. Spread cocnut flakes on a spread sheet and toast for approximately 10 minutes. Take out and let cool. Set coconut flakes aside. Repeat the process with the pecans.

2. In a medium bowl, whisk together the egg yolks, sugar and salt until well combined.

3. Bring milk, heavy cream, coconut milk, and condensed milk to simmer in saucepan. Heat until bubbles form around the edges of the saucepan, approximately 8 minutes. Slowly add the milk mixture into the bowl of whipped eggs, while whisking to prevent curdling. Return all back into the saucepan over low heat, stirring constantly until mixture starts to thicken.

4. Stir in chocolate extract, coconut, and pecans. Let cool and cover with plastic wrap and chill in refrigerator for 2 hours.

5. Once chilled, add the bittersweet chocolate. Pour mixture into ice cream maker and freeze according to manufacturer's instructions.

Source: Inspired by Ben & Jerry's Chocolate Almond fudge and Food Network.

Wednesday, August 5, 2009

Baked Ziti Pasta

I saw this recipe on Annie's Eats and I just had to try it for dinner. I thought of my husband when I first saw it because he really enjoys pasta. This recipe was very delicious and very hearty. My husband espcially liked it, but it was a little bit too heavy for me. Still, I will proabably make it again.


Baked Ziti Pasta

2 large eggs, lightly beaten
1 teaspoon table salt
Pinch white pepper
1 1/2 cups Parmesan cheese
1 lb Ziti pasta
1 tablespoon olive oil
1.5 - 2 lb ground turkey
1/2 cup yellow onion, diced
3 cloves garlic, pressed
1 (28 oz.) can tomato sauce (reserve a ½ cup)
1 (14.5 oz.) can diced tomatoes
1 teaspoon dried oregano
1/8 cup chopped fresh basil leaves
1 teaspoon sugar
3/4 teaspoon cornstarch
1 cup whole milk
1-2 cups mozzarella cheese

1. Preheat oven to 350 degrees F. Bring a large pot of water to a rolling boil. Add salt and then pasta; lower heat and simmer until almost al dente. Drain pasta and set aside. Whisk eggs and parmesan together in a medium bowl; set aside.

2. In a small bowl, stir together cornstarch and whole milk. Set aside.

3. In a skillet, heat olive oil over medium heat. Cook onion and garlic until softened. Add ground turkey and brown. Stir in tomato sauce, diced tomatoes and oregano. Simmer about 10 minutes until thickened. Remove from heat. Once cooled, stir in basil, sugar, salt and pepper.

4. In a large pot over medium heat, whisk cornstarch and milk until thickened, 3-4 minutes. Remove from heat and add egg/parmesan mixture. Continue to whisk until combined. Transfer the ground turkey mixture into the pot and simmer until thickened, 10 minutes. Remove the pot from the heat. Add the pasta and toss in the sauce.

5. Transfer the pasta to a 9 x 13” baking dish and spread remaining tomato sauce over the pasta. Sprinkle mozzarella cheese. Cover with foil and bake for 30 minutes.

6. Remove foil and cook for another 20 minutes or until the cheese is bubbling. Cool for 15 minutes and serve.

Source: Adapted from Annie's Eats.

Tuesday, August 4, 2009

Green Cleaning: All-Purpose Cleaner


Unlike most commercial cleaning brands, “soft chemistry” products are cheaper, safer and environmentally friendly. They are a natural alternative to chemical cleaning that do the same effective job without giving you a nasty allergic reaction. But the best part of all is that you can make them right in your kitchen, so you know exactly what goes into them.

One of the most common cleaners I use is the all-purpose surface cleaner. It works great on kitchen countertops, toilet seats, sinks and just about anything else you can think of--all while deodorizing bad smells. All you need is vinegar and essential oils. The acetic acid in the vinegar is what helps get the tough job done coupled with the disinfectant properties of an essential oil. It is non-toxic and will keep indefinitely. So get rid of your old household cleaner and go green with this fresh alternative.

All-Purpose Cleaner

1 pint of distilled white vinegar
20-30 drops of essential

Essential Oils with disinfectant properties include:
Eucalyptus Oil
Tea Tree Oil
Grapefruit Seed Extract

OR try bacteria fighting herb essential oils such as:
Lavender
Rosemary
Sage
Mint

1. Pour vinegar into an empty spray bottle and add drops of essential oil. Shake well before every use. No need to rinse. If vinegar smell is too strong, you may also add 1 cup of water to dilute.

Source: Home Hints and Tips and
Annie B. Bond.

Sunday, August 2, 2009

Salpicon (Non-Alcoholic Fruit Cocktail)


On Saturday, I went grocery shopping and paid some really amazing low prices on fruits. The orginal plan was to go to my grandmother's house to make empanadas, but it was just too hot to fry outside (It was probably around 107 degrees which is normal Las Vegas temperature during the summer). We rarely fry inside the house since the smell will linger for days. So I justed payed them a short visit and caught up on stories. Since grandma works at a grocery store, she likes to check on me to make sure I am not paying too much for groceries. And when I do pay too much, she scolds me and reminds me that I need to buy using 'price-match' at the store she works...otherwise I am just throwing money away. She knows all the best deals that are available--we call her the Price-Match Queen. So, at the end of my visit, grandma stuffed my purse with grocery ad deals and sent me on my way to shop.


It was pretty exhilerating to get a grocery cart full of fruits for less than $20. I was able to bring home watermelon, peaches, green grapes, granny smith apples, papaya, a pineapple, plums and a few other things. I kept trying to think up recipes that would use up all the fruit. My husband and I have to eat it pretty quick before it goes bad. And then I had a faint memory of myself, five years old, enjoying a delicious Colombian fruit cocktail (non-alcoholic of course) that I drank when we used to live in Miami, FL.

Salpicon is one of my favorite fruit drinks. It is so refreshing and a real treat! You can also eat it as a dessert topped with vanilla ice cream and condensed milk. Joy!!

Salpicon

Fruit Cocktail
4 cups Passion fruit juice drink (or any other fruity drink)
6 cups of assorted fruit cut into bite sized sqaures
Assorted fruits include:
Pineapples, Apples, Seedless grapes, Peaches, Bannanas, and Watermelon

1. Combine all ingredients in a large pitcher and stir.

Dessert

1. Pour fruit cocktail in a glass. Top with a scoop of vanilla ice cream and drizzle with condensed milk.

Source: Adapted from My Colombian Recipes.