Tuesday, December 29, 2009

Healthy Whole-Wheat Apple Pancakes

I would like to start the new year by posting this healthy and wholesome recipe for those out there that have made their New Year's resolution to eat healthier. These whole-wheat apple pancakes are DELICIOUS and you can eat them without feeling guilty! I too have made it my goal this year to eat healthier by incorporating more vegetables into my diet and by making more homemade foods that are free from articial flavors, high fructose corn syrup, and long named preservatives.

Apple Pancakes

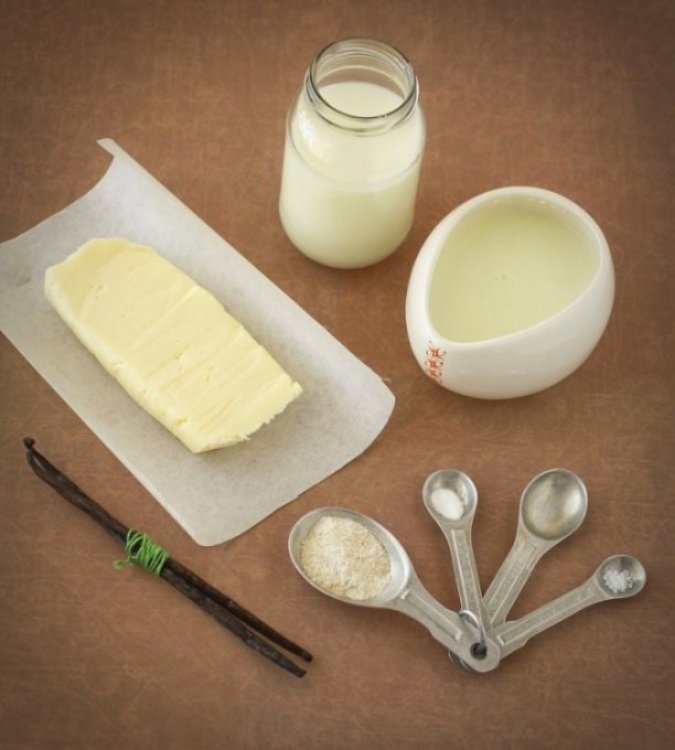
Reasons I consider this recipe healthy: I used homemade buttermilk of which I extracted from store bought cream. Ideally I would eventually like to make it from raw cream, however, I haven't quite yet figured out where to get my hands on some fresh cream. If you are interested making your own butter and buttermilk from store bought crem, you may want to check out this tutorial. Also, this recipe cuts down on the refined flour by using half whole-wheat flour and half all-purpose flour (using only whole-wheat flour would make a really heavy dense pancake). For the whole-wheat flour, I used freshly ground flour that I milled in my new L'Equip 760105 VitalMill Grain Mill
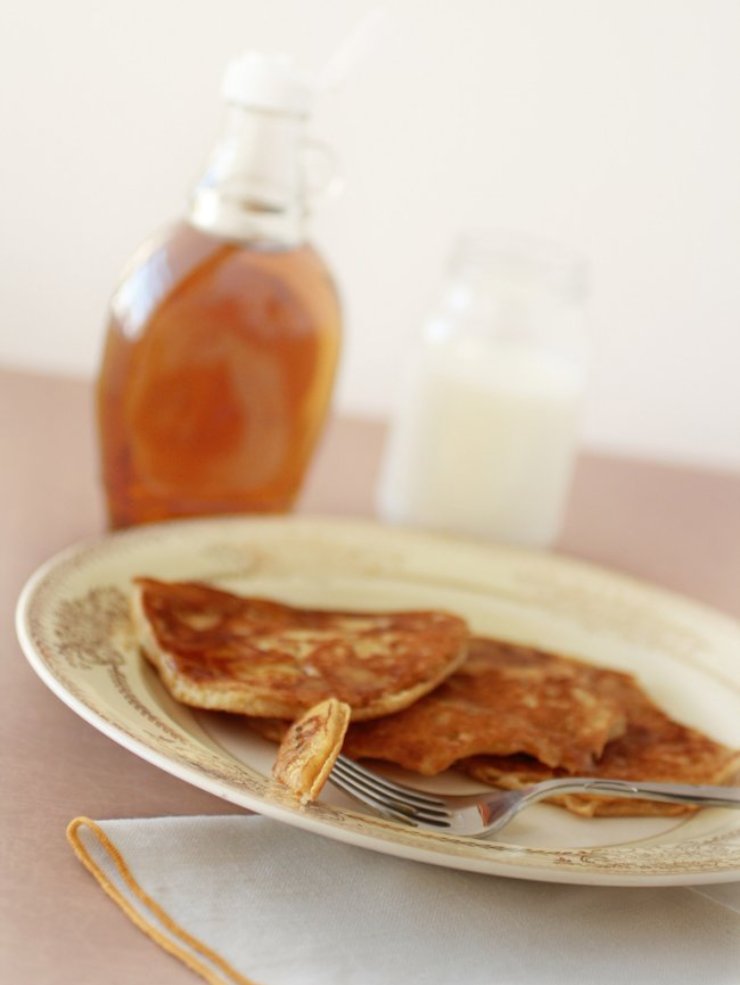
that Santa Claus brought me this year. Lastly, I used 100% pure maple syrup which is healthier than maple flavored syrup. Maple flavored syrup contains common sweeteners like corn syrup and sucrose which have had all their nutrition processed out of them, but maple syrup's health benefits are all there.

Fresh Butter & Buttermilk

This recipe is also a great way for using up your food storage such as powdered milk instead of fresh milk, dried apples instead of fresh apples, or powdered eggs instead of fresh eggs. For the measurements on using powdered milk, refer to this handy conversion chart from the All About Food Storage Blog.

Apple Pancakes

Whole-Wheat Apple Pancakes

1 medium apple, diced
3/4 cup all-purpose flour
3/4 cup freshly ground whole-wheat flour
2 teaspoons baking powder
1/2 teaspoon baking soda
1/4 teaspoon salt
1 cup freshly made buttermilk (or store bought low-fat buttermilk)
2 1/4 tablespoons dry non-instant powdered milk with 3/4 cup of water with liquid
ingredients (or 3/4 cup of milk)
2 tablespoons powdered egg with 1/3 cup water with liquid ingredients (or 2 eggs)
1 tablespoon honey
6 tablespoons pure maple syrup
1 tablespoon vanilla extract

1. In a large bowl, sift the dry ingredients. In a soft bowl, whisk the wet ingredients. Slowly add the wet to the dry ingredients and half of the apple. Stir until just combined.

2. Heat a large nonstick griddle or skillet over medium heat. Either spray griddle or skillet with PAM or grease with fresh unsalted butter. Spoon 1/4 cup batter onto the griddle for each pancake and sprinkle each with remaining apple. Cook until the tops are bubbly and edges are dry, about 2 minutes. Flip and cook until golden brown.

3. Place 2 pancakes on each plate and drizzle with syrup.

Source: Adapted from Food Network Magazine, November 2009.

Wednesday, December 16, 2009

Winter Squash Bread

I made this bread back in November and it turned out surprisingly good. I used homemade pureed banana squash and freshly ground whole wheat white flour. Since I don't have my own flour grinder at the moment, my mother-in-law was kind enough to left me use hers. It was quite the experience to grind my very own fresh flour! I can't wait until Santa Clause brings me my own flour grinder. Yippee!!

The only drawback to this bread was that the whole wheat flour made the bread very dense. Next time I make this I will probably adjust the flour and use either bread flour only or 1/2 whole wheat and half all-purpose flour.

Photobucket

Winter Squash Bread

1 ½ cups warm water (100°F)
1 package active dry yeast
¼ cup light-brown sugar
2 large eggs
1 cup winter squash or pumpkin puree, canned or homemade
1 tablespoon kosher or sea salt
½ cup yellow cornmeal, plus additional for sprinkling
5 ½ to 6 cups bread flour (optional: Instead of bread flour, combine 3 cups whole wheat and 3 cups all-purpose flour)
Olive oil for bowl and baking sheet

1. In a large bowl, add warm water and sprinkle the yeast and a pinch of brown sugar. Let stand until foamy, about 10 minutes.

2. With a whisk, beat eggs and squash puree into the yeast mixture. Mix in remaining brown sugar, salt, cornmeal, and 2 cups of the flour. Mix until smooth, about 3 minutes.

3. Turn the dough out onto a lightly floured work surface and knead until the dough is soft and tacky. Add more flour if necessary. Oil a bowl and add the dough, turning to coat. Cover with plastic wrap and allow the dough to rise at room temperature until doubled, 1 to 1 ½ hours. Gently deflate the dough. You can either bake the bread right away, or put it away in the fridge over night to allow the dough to ferment and develop flavor. If you refrigerate over night, be sure to let the dough sit at room temperature for 4 hours.

4. Preheat oven to 450°F. Lightly oil a bread pan. Turn dough out onto lightly floured surface. Form the dough into 2 round loaves and put into pan. Cover loaves loosely with plastic wrap and let them rise for 30 minutes, or until doubled. Dust tops of the loaves with flour.

5. Reduce the temperature to 375°F and bake for 45 to 50 minutes. Cool on a rack.


To Make Squash Puree

1. Preheat oven to 375°F. Use pumpkin or any kind of squash. Cut the squash in half and scoop out seeds. Save seeds for roasting. Put squash in a baking dish, cut-side up. Brush with butter, season with salt and pepper.

2. Bake in oven for 45 minutes or until tender.

3. Scoop out flesh and mash or puree until smooth in a food processor.

4. Press puree through a fine mesh.

Source: Unknown.

Monday, December 14, 2009

Happy Birthday Alexis!

This past weekend, my little cousin Alexis turned 9. I wanted to capture the moment on camera but had a little trouble with the low light. Nevertheless, she looked like a princess!


Sunday, December 6, 2009

A trip to Hearst Castle

For the Thanksgiving holiday, my family and I took a trip to California and stayed in the charming dutch town, Solvang. While there, my cousin and I went exploring on our own and we visited Hearst Castle in San Simeon and we did a bike tour in the downtown district of San Luis Obispo. It was a grand old time! We saw so many beautiful things and even went olive oil tasting!


Sunday, November 15, 2009

Squash Ice Cream with Short Bread Cookies


Squash and Short Bread Cookies Ice Cream

1 cup fresh Squash puree or canned unsweetened pumpkin puree
1 teaspoon vanilla extract
2 cups heavy cream
3/4 cup firmly packed brown sugar
5 egg yolks
1/2 teaspoon ground cinnamon
1/4 teaspoon salt
1/2 teaspoon pumpkin spice
Pinch of ground nutmeg
1/3 cup condensed milk
1-2 cups crushed shortbread cookies

Squash Puree

1. Pre-heat oven to 375 degrees F. Use pumpkin or any kind of squash, such as acorn, butternut, or Hubbard. Cut the squash in half and scoop out seeds. Put squash in a baking dish, cut-side up. Brush with a little butter or olive oil, season with salt and pepper. Bake in oven for 45 minutes or until tender.

2. Scoop out flesh and mash or puree until smoth in a blender or food processor. Strain puree to remove any stringy pulp.

Squash and Short Bread Cookie Ice Cream

1. In abowl, whisk together pumpkin puree and vanilla. Cover and chill for approximately 2 hours.

2. In a bowl, whisk egg yolks, cinnamon, salt, nutmeg, pumpkin spice, 1/2 cup cream, and 1/4 cup brown sugar. Whisk until smooth and sugar dissolves.

3. In a heavy saucepan over medium heat, warm 1 1/2 cups cream, 1/3 cup condensed milk and 1/2 cup brown sugar. Cook until bubbles form around edges of pan, 6-7 minutes.

4. Remove cream mixture from heat. Gradually pour 1/2 cup of hot cream mixture into egg mixture all while whisking. Pour egg mixture back into pan. Cook over medium heat while stirring constantly to keep the custard at a low simmer and to avoid scorching, about 7-9 minutes. Custard will thicken enough to coat the back of a spoon.

5. Pour custard in a bowl and allow to cool. Whisk squash puree into mixture until smooth. Cover and chill for approximately 2 hours.

6. Fold in crushed short bread cookies. Transfer custard to an ice cream maker and freeze according to manufacturer's instructions.

Source: Inspired by Williams-Sonoma.

Friday, November 13, 2009

Tender at the Bone and Peanut-Butter Granola Balls

In her memoir, Tender at the Bone, longtime food critic Ruth Reichl shares her childhood story of growing up in a dysfunctional family where she endured many culinary disasters and yet somehow manages to develop a love and passion for food.

Photobucket

At an early age, Reichl quickly discovers that she was able to read people’s personalities based on the food they’d eat. Her relationship with her manic depressant mother is complicated but it creates in Reichl a sense of duty to keep her mother “from killing anybody who came to dinner” and eventually it turns into a determination to make sense of the world through food. It is then that we follow Richl on her culinary adventures and where we meet the colorful characters that shape her world.

If you are a foodie, this is a great read full of stories that are sweet and charming. I recommend it as it is highly delicious and you may find it on the Hortt's Bookstore.

Photobucket

Peanut_Butter Granola Balls

1/3 cup honey
1/4 cup natural peanut butter
2 tablespoons unsalted butter
1 cup crisp rice cereal
1 cup old-fashioned rolled oats
1/4 cup dried fruit

1. Heat honey, peanut butter, and butter in a small saucepan. Stir until smooth, 1-2 minutes. Stir in cereal, oats, and dried fruit.

2. Drop mixture into mini paper cupcake or candy liners. Place on a rimmed baking sheet and refrigerate until set, about 15 minutes. To store, refrigerate in an airtight container up to 1 week.

Source: Martha Stewart's Everyday Food.

How to Get Feedback When You're Rejected - On Careers (usnews.com)

How to Get Feedback When You're Rejected - On Careers (usnews.com)

Posted using ShareThis

Tuesday, November 10, 2009

Pan De Queso

Recently my uncle met a woman whose family used to own a very popular bakery in his hometown of Cali, Colombia. He became good friends with her and she eventually shared her family’s secret recipe for Pan de Queso. I have to share this recipe as it is a big deal for my family because we all LOVE Pan de Queso, but I also want to share a story that shows what a small world we live in.

The woman my uncle met had inherited the bakery from her family but decided to sell it as she had no interest in baking. Instead, she was interested in business and eventually started her own a hotel in Cali. But after a long series of unfortunate events, she found herself in the United States trying to make a better life for herself and her son. Its amazing that she and my uncle came from the same town. My uncle had told me that back in the day, this bakery was very popular and well known for its Pan de Queso (or cheese rolls). People used to stand in long lines just to get a batch, but there was never enough Pan de Queso to go around. My uncle distinctly remembered that he and a family friend used to sneak to the back of the bakery to purchase their bag of Pan de Queso. At that time, people with money would sneak to the back of the bakery to by pass the line—they of course were able to pay a little extra for their batch of Pan de Queso. Who would have thought that they would meet someday and fall in love.

In the pictures below is my mother showing me how to make Pan de Queso based on what my uncle's friend showed her. This recipes however came from her memory and uses Colombian ingredients and in European measurements. We did our best to make the measurements more American friendly.

Take all the ingredients and mix them in a large bowl. Let mixture sit in bowl for 20-30 minutes.

Photobucket

Photobucket

Below is my mother's little helper.

Photobucket

Photobucket

Photobucket

Dust yucca harina over a flat surface. Pour the batter over the floured surface and kneed until all the ingredients are mixed well and dough is soft.

Photobucket

Create the circular shapes as seen in the picture and place over a greased cookie sheet.

Photobucket

Photobucket

Photobucket

Bake at 350 degrees F for 15 minutes. Reduce the temperature to 300 degrees and allow to bake for 5 more minutes.

Photobucket

Pan de Queso (Cheese Rolls)

2 lbs Queso Cotija
1 lb Yucca Harina
2 tablespoons sour cream
¾ cup Arepa Harina (Venezuelen)
¼ tablespoons butter
¼ cup milk

Wednesday, November 4, 2009

Homemade Butter

I never imagined that it would be possible to make butter in my own kitchen, but it is and it was delicious! I don't think people realize that they can make their own butter as it is a lost art. But I have discovered it is simple, cost effective, and most importantly healthy. Most people avoid butter because they think its bad for you, but it turns out that it is a good source of vitamin A, high in trace minerals and antioxidants. As long as you don't over do it and exceed your daily saturated fat percentage, you can enjoy butter without worrying.

For this tutorial, I was originally attempting cultured butter, but what I really ended up with was sweet cream butter. It was good nonetheless, but I'll have to experiment a little further to achieve the taste I am looking for. So here's how I did it..

I started out with a carton of leftover cream that didn't get used for ice cream and added a heaping spoonful of cultured yogurt. Then I let it sour in the fridge for about 1 week past its expiration date. It should aquire a pleasant tangy smell. (Note: If you cream looks like its curdling, or it smells or tasts bad, discard it.)

Once the butter was cultured, I poured it into a mixing bowl with a stand mixer. Then I covered the mixture with plastic wrap to avoid splashing and started to beat the cream.

Photobucket

Photobucket

Photobucket

The butter will undergo three phases: 1) creamy, 2) grainy, and lastly 3) chunky as it begins to split. Here you begin to see the buttermilk separating from the butter.

As you can see in the picture below, after about 5-7 minutes of beating, the butter started splashing as it began to split.

Photobucket

Photobucket

Photobucket

Photobucket

Photobucket

Photobucket

Now the butter has split leaving butter and buttermilk. I drained the buttermilk and reserved it for baking. I gave the butter a quick rinse to wash off any excess buttermilk. Then I put it on my wooden cutting board and smacked it around with a wooden spoon to get any residual liquid out. Wood works well as butter does not stick to it very easily.

Photobucket

Finally I shaped it and wrapped it in parchment paper. You can also add sea salt, however, I did not as I was planning on storing it in the freezer. The butter stores longer in the freezer when it is not salted.

So there you have it. Fresh butter!

Thursday, October 29, 2009

A Gypsy at Trunk R Treat

This year I was not planning on dressing up for Halloween. But after I saw a commercial for the horror flick, "Drag Me To Hell", I was inspired to dress up as the old gypsy woman with the discolored eye. My pet monkey rode on Muppet's back. I decided to show off my costume during our Trunk R Treat event held by my church every year. Needless to say, no one at the event recognized me. Ha!

Photobucket

Photobucket

Photobucket

Pumpkin Squash Festival

I have noticed that every year during October, the Martha Stewart magazines are always chock-full of articles and pictures of pumpkins available in every color imaginable. They make the reader excited about the fall when they describe to you all the clever ways that you can decorate your table top with these elaborate squashes. But if you are like me, whenever I go looking for these unique colored pumpkins, they are no where to be found. Everywhere I look, I only see orange pumpkins. That is, until I read about the Pumpkin Squash Festival in this article on the Centennial View.

This is what I discovered...

Photobucket

Photobucket

Photobucket

Photobucket

Photobucket

Photobucket

Pumpkins and squashes come in all shapes, sizes, colors, and there are hundreds of different kinds of squashes and they all have unique flavors and textures. They are great for carving, but they are even better for cooking. You can make pies, soups, and even glazed pumpkin or squash that are delicious and packed with vitamin C, A, fiber and carotenoids.

Of all the unique squashes I saw this year, I recently discovered the spaghetti squash. It has a mild , delicate flavor and when it is cooked, it looks like thin translucent strands of spaghetti. You can either eat it like its spaghetti (with cheese and marinara) or you can make hash browns with it. But either way, spaghetti squash is a dieter's dream--a four ounce serving only has 37 calories!

Photobucket

Photobucket

Bake: Cut the shell in half lengthwise and scoop out the seeds and fiber. Pierce the shell all over with a large fork or skewer and place in a baking dish cut side down. Fill with enough water to cover the bottom. Cook in oven at 375 degree
approximately 1 hour or until flesh is tender.

Spaghetti Squash Hash Browns

1 Medium Spaghetti Squash, cooked
1/3 cups all-purpose Flour
1/2 cup Grated Parmesan Cheese
4 Tablespoons Butter or Olive Oil
Salt and Pepper to taste

1. Prepare and cook squash (see basic methods above). Mix squash strands with flour and cheese.

2. Heat 1 Tablespoon butter or oil in skillet over medium-high heat. Spoon 1/4 cup of squash mixture into skillet. Form a thick "hash brown" cake.

3. Cook until bottom is lightly browned. Cook until lightly browned.

Source: Spaghetti Squash.